Finally decided to spend some time and share this build on here. To start from the beginning I’ve gotta go back quite a ways. Please spare with me as I don’t have tons of pictures from back in the day. I’m assuming I lost them on old phones and things like that. So everything I have is just what I happen to have left.
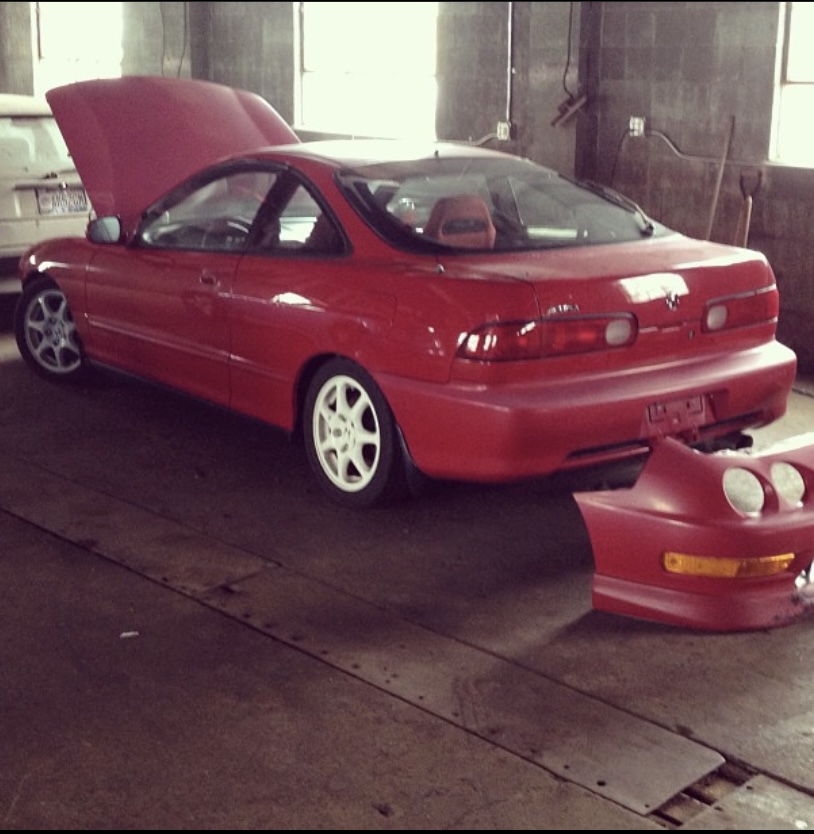
I bought this car back in 2008, a couple weeks after I turned 18, and a few months after I totaled my 2000 civic coupe. It is an integra gs, which basically had everything from a gsr except the motor.
When I got the car, I was finishing up my senior year of high school. I ended up getting a set of tein lowering springs, a skunk exhaust, Megan racing header and a password jdm carbon fiber intake.
After this, I ended up parking the car in my parents garage while I went off to my first year of school. But my entire first year of college was basically class, constantly browsing the old NWP forums, and making not smart decisions in my free time. Next up, I’ll get into my first summer back home, working at a tire discounters and making as much (very little) progress that I could on this car.
So my first summer back from school, I met some local central Ohio guys through local forum meets who were much more knowledgeable in building hondas. I spent just about the entire summer hanging out with these guys, learning everything I could about building “legitimate” Honda’s. Unfortunately I was a broke kid at that time so all I could do was read forums, browse classifieds and dream, haha!
I did end up going to my first bigger non-local car meet which happened to be import alliance 2009 in Nashville. After being there around so many well put together cars, I was hooked.
I came home and spent about all my spare money on a set of coilovers, and picked up a set of rota’s from a friend (remember I’m still broke at this point).
I was extremely happy with the stance of the car now. Much lower than the lowering springs rode, which I wanted.
Not having any money to jump into a full scale build, I decided I wanted to pull the motor and tackle a wire tuck and clean everything up in the engine bay. It wasn’t going to make the car any faster, but it was my way to continue learning and making this car somewhat of a “build”.
For the next 3 years, the car basically got beat up. I got to a point in school where I needed a car on campus to drive to my co-op job. It was parked on a street, and got mirrors kicked off, egged, bumped into while parked, etc.
It sucked having no option but to let it continue. But I did start to make a little money and started collecting parts. I was able to pick up a jdm front end, 36mm 5 lug with ctr wheels, a Mugen gen 1 spoiler and a bunch of other stuff that I was storing in my basement.
Finally in 2012 I was able to buy a tsx to take over daily duty, and park the integra back at my parents house while I finished my last year of school.
In mid 2013 I graduated from college, moved back home and started a job making decent money full time. My first check went to one of my good buddies and I bought a set of 16x7 volk re30’s, which I had wanted for a long time.
A good friend of mine’s dad also bought a shop building for the purpose of working on our project cars. I was fortunate enough to be able to take my car over there and start the full scale build.
This pretty much starts the beginning of what I will call the “build” in 2013. I would have hoped it happened quicker, but getting married, buying a house, having kids and all sorts of other life just happened to come along.
So once the car got into the shop, I basically stripped the whole car down. Sold the USDM front end, original motor and trans and my 4 lug. Then got to work on getting the shell ready for paint and a k swap.
One thing that I knew when I bought the car was that the passenger quarter panel had been replaced. It was replaced by a dealership with an rdot panel, so I thought everything was good. Turns out it wasnt. One day hosing the car down I had paint flake off from the bottom of the quarter lip inside and found rust. After digging further, the whole panel was attached with only panelbond. Not sure how strong it’s supposed to turn out, but I was able to break the entire panel off just prying with my hands. So now a quarter panel had to be dealt with as well.
Before I dealt with that, I wanted to get some of the “cooler” items going like prepping for the k mount and jdm front end on the car. So first up after stripping the car down was removing the factory b series mount.
My front bumper bracket had been tweaked at some point and didn’t notice til later, but I was able to straighten that and get everything aligned pretty well. Next up, the quarter panel.
After separating that piece, the inner was paper thin and not really something I felt 100% comfortable remaking myself. After tinkering with it for quite a while, I found someone who was willing to do the metal work for me so I could just get this part crossed off the list. I’ll get to that part next.
So I had the front and rear glass removed from the car, broke one of the quarter windows trying to pull it myself and decided to leave the other one for the time being. Then my brother-in-law and I trailered the car about 45 minutes to the shop where the quarter work was being done.
I was fortunate to find one of the last rdot itr quarter panels through a local dealer. My good friends dad happened to be the parts manager at the dealership so I got it for a steal as well.
I ended up getting the itr quarter just because I couldn’t bear the thought of installing the ls quarter panel, just to weld the holes shut and potentially warp a new panel.
While the car was there, I ended up having them shave the rear squirter, side moldings, antenna, power holes at the spoiler and front and rear emblems.
After getting the car back to our shop, the first thing I wanted to do was get the car on the lift, get the rear quarters rolled and get started on undercoating so I could re-assemble the suspension. When I went to roll the new quarter panel, I noticed it really wasn’t attached like the factory quarter should have been.
After contemplating it and it really bugging me for a few days, I cut part of the new inner the shop had made out and remade it myself.
I took a piece of the old quarter, put it in a break to make it L shaped and sliced it every inch to let me form to the wheel curve. Then I tacked each ear to the existing inner panel. I intended on using a spot welder to then attached the inner and the outer exactly like factory, but my spot welder broke. So I used panel bond and added some butt welds in a few spots throughout the inner/outer quarter lip connection. This would let me then roll the quarter and have everything inside be like a factory panel connection.
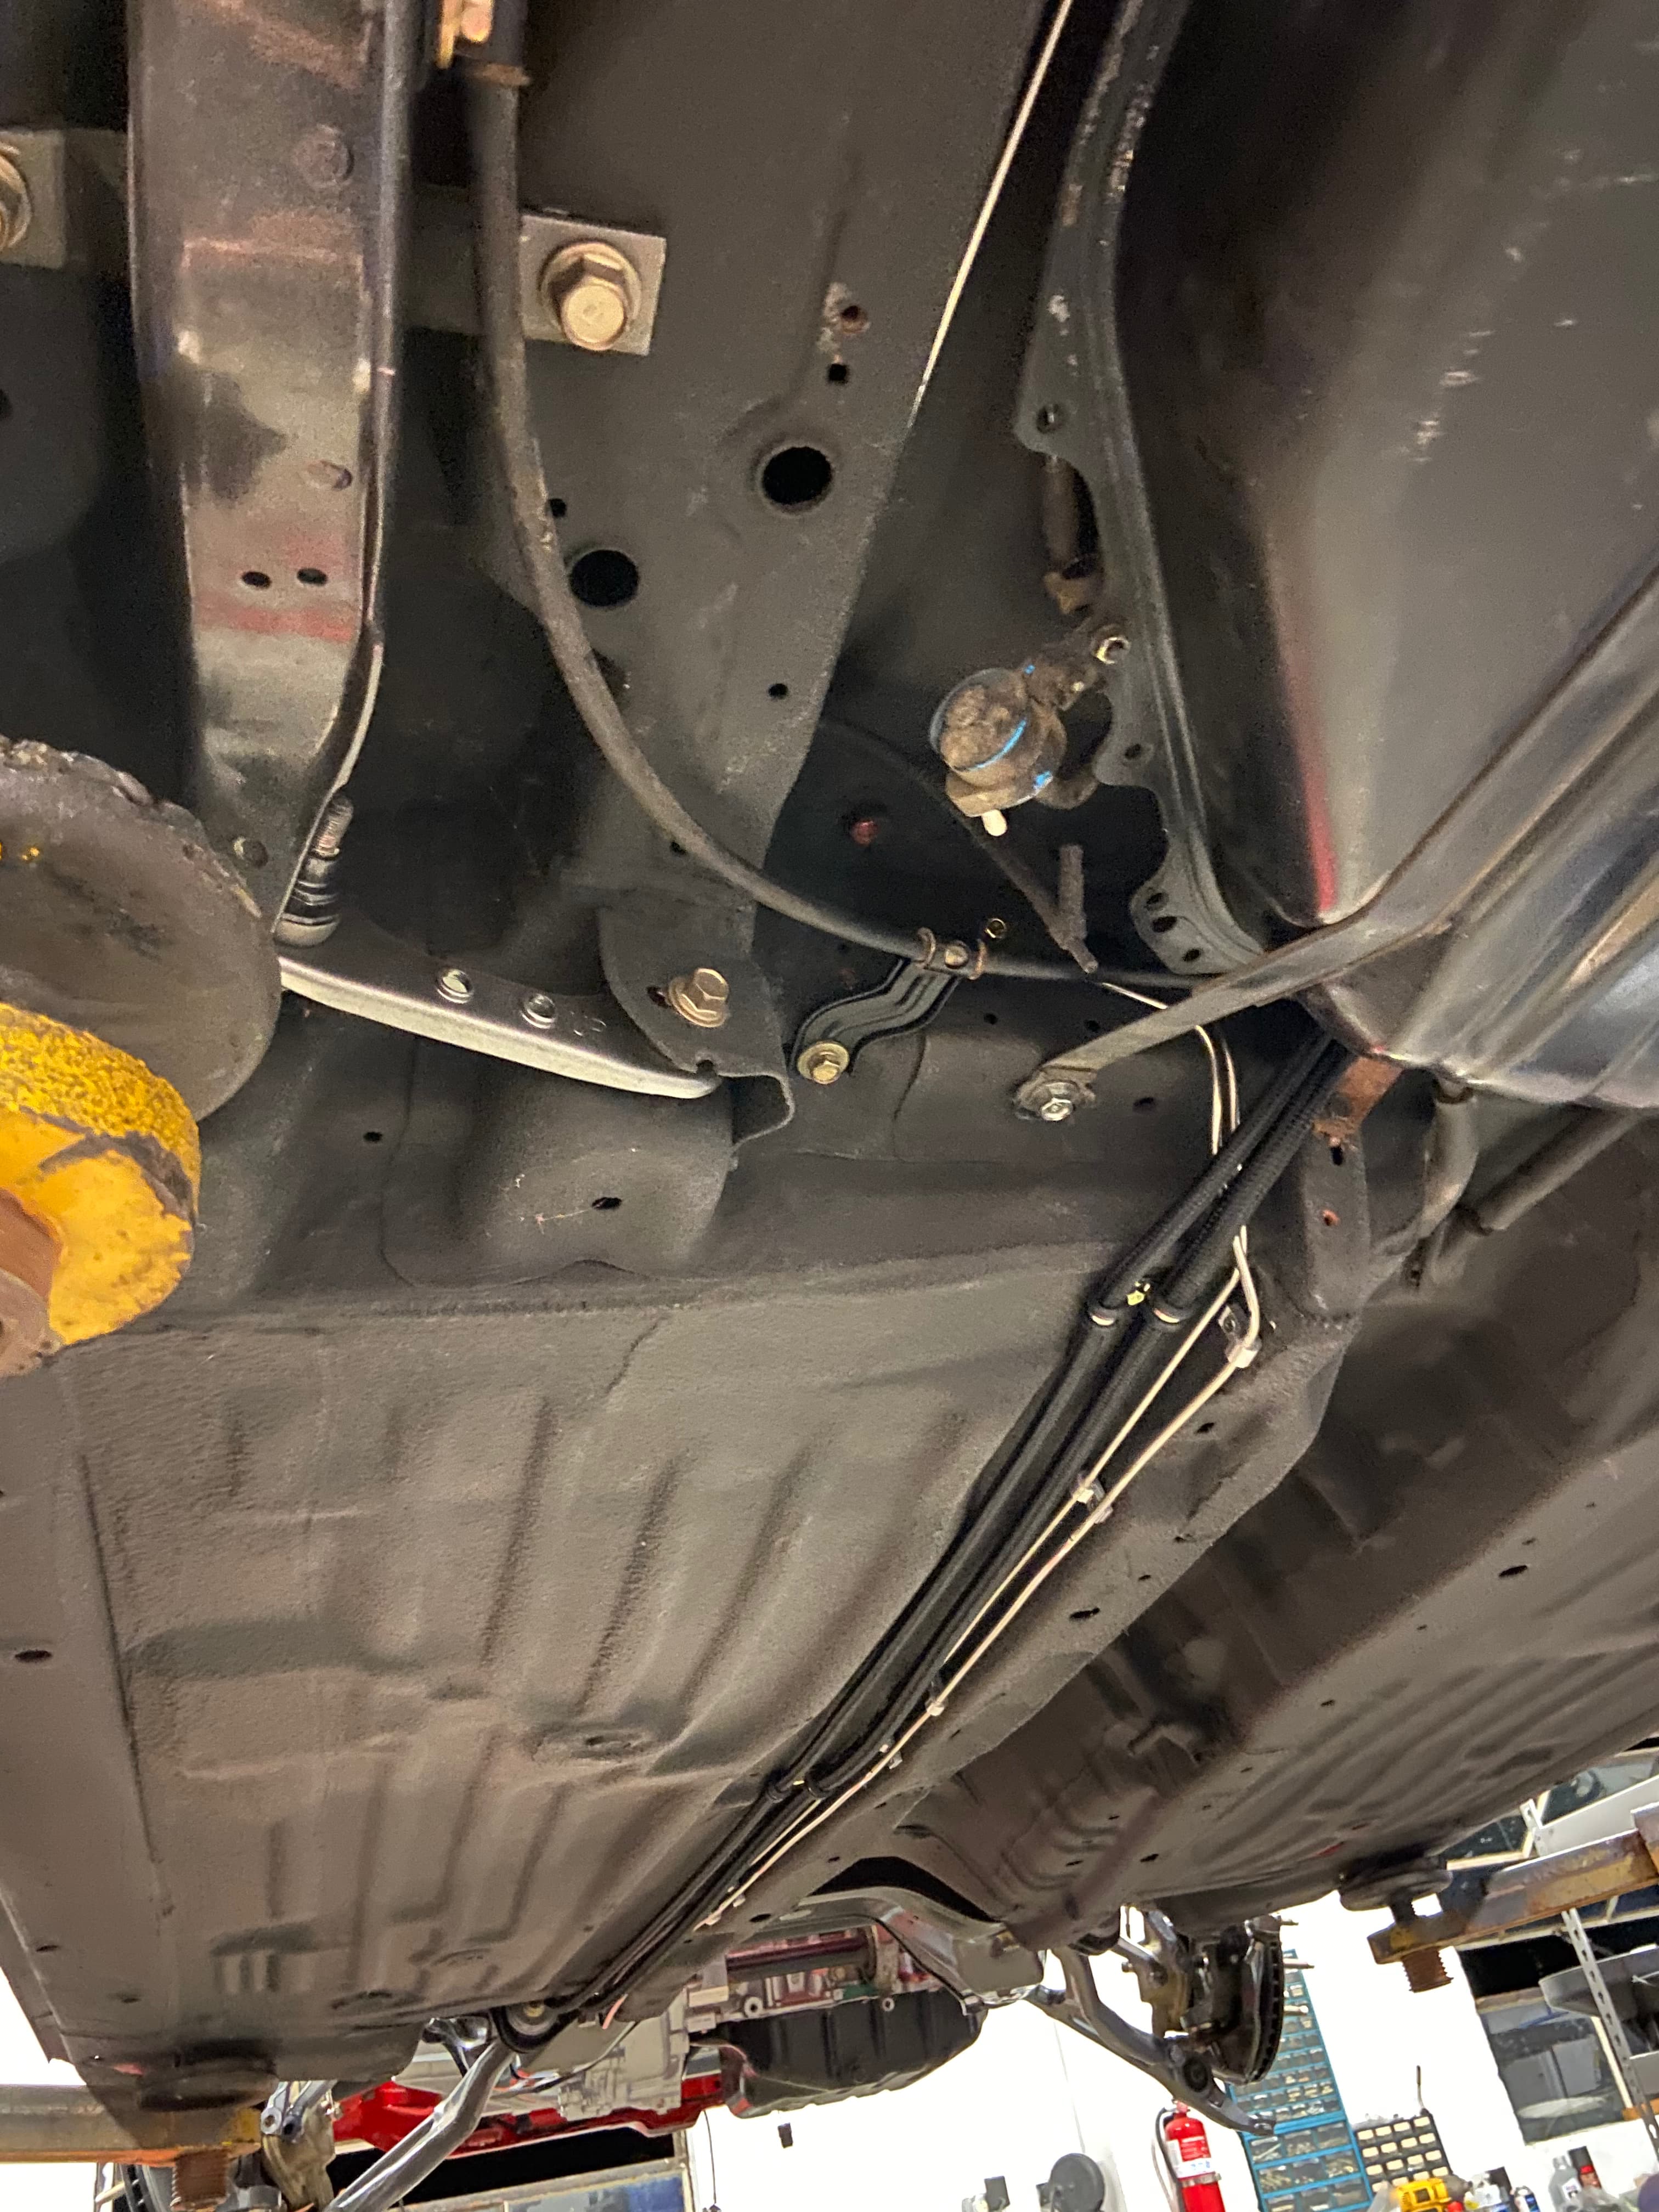
First I used simple green and a scrub brush to clean the underside of the car. Turned out pretty good. Then since the car is from the Midwest and had some surface rust spots, I wire wheeled it all, hit it with rust converter in spots and then hit all the bare spots with epoxy primer.
Once everything was prepped, I masked everything off, hung plastic and got spraying.
I ended up using lizard skin undercoating. I did the sound deadening followed by their thermal insulation. I couldn’t be happier with the way the undercoating all turned out. Finally time to start getting things assembled back onto the car!
So while all this quarter panel work, undercoating and all that was going on, I was also working on refreshing my 5 lug setup.
I ended up ordering a complete hard rubber bushing kit from PIC/Suja1. I burned and knocked all the old bushings out, sandblasted all the suspension components, and then powdercoated everything.
We have an Eastwood hot parts kit at our shop so everything that fit in a conventional oven I was able to do myself. The front subframe, rear trailing arms and my wheels were all powdercoated by a semi local shop.
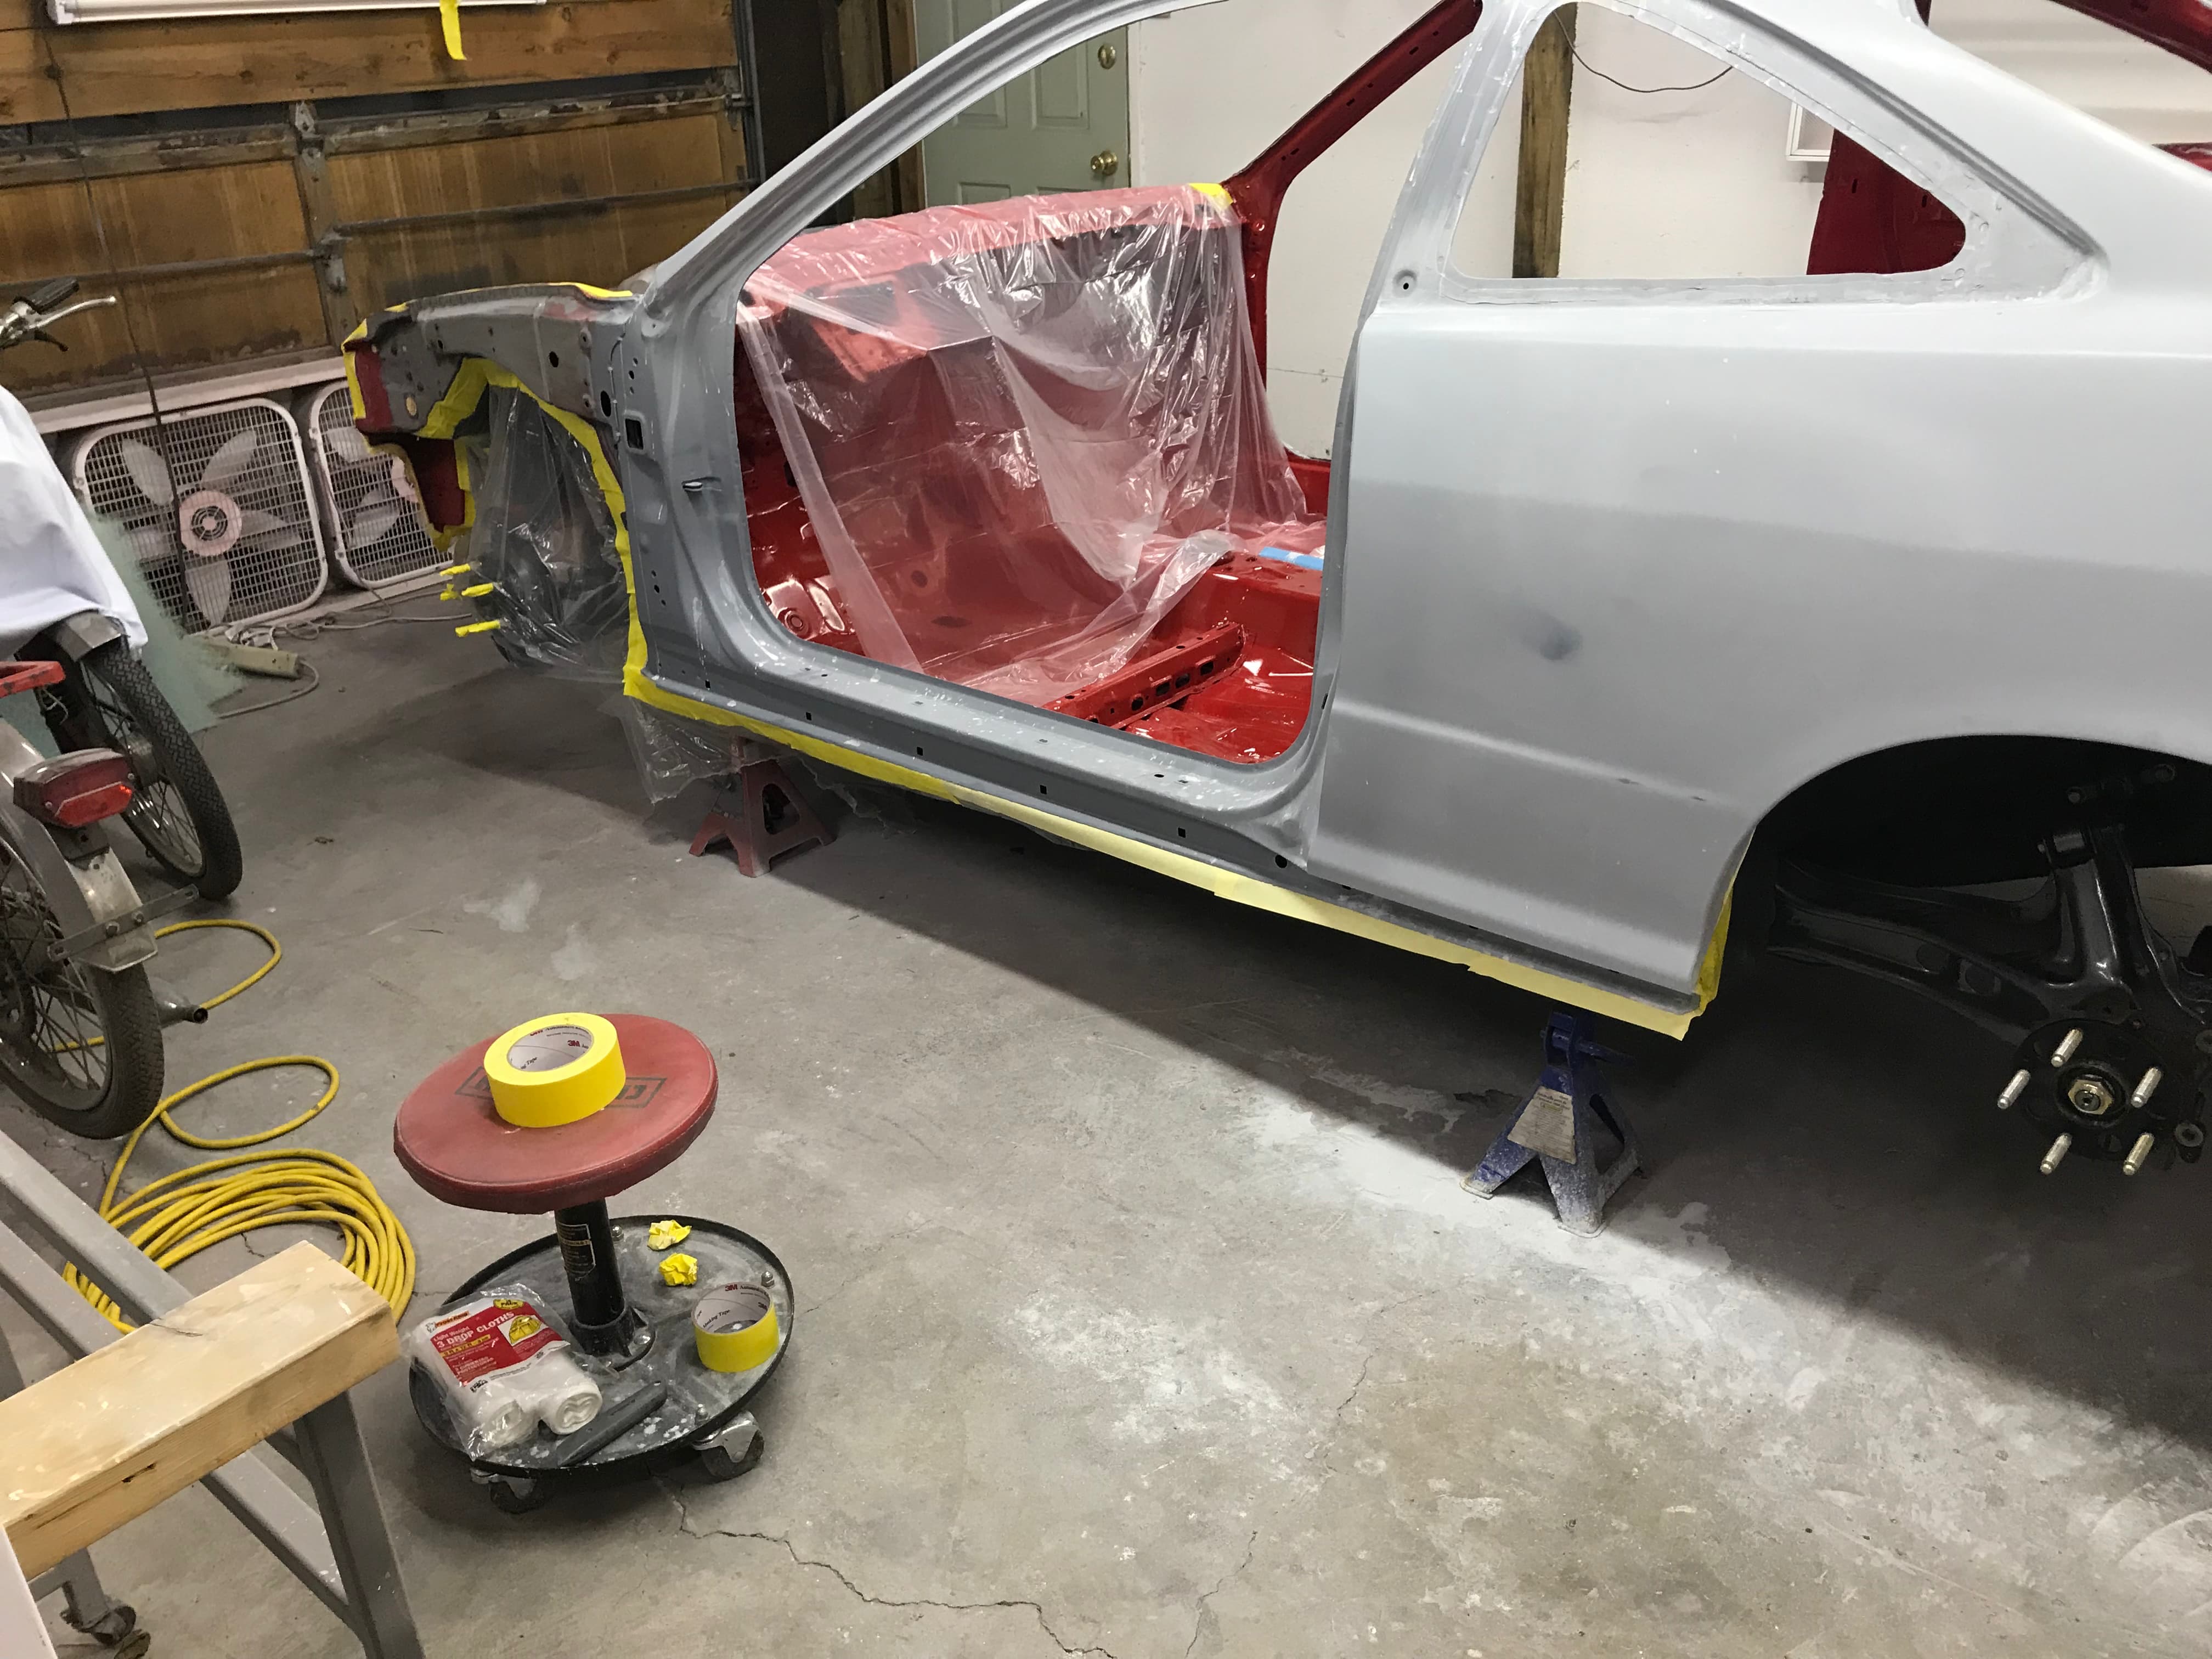
I did decide to hold off on putting the front subframe back in the car to make it easier to paint the bay and not get overspray or make certain areas hard to hit. So we decided to get the bay prepped and ready to spray to keep progress going.
The color I ended up going with is called curva red. It is off the 2017+ nsx. I originally wanted to go with new formula or something brighter than the original Milano red, and the timing just worked out where this came out shortly before I was ready to paint.
I also ended up paint matching the hasport bracket for the k swap mount. And then started getting the front subframe and suspension back into the car. This was the first time in over 5 years the car was on its own wheels again!
Sometime before all of this happened, I ended up picking up my motor. I ended up going with a k24a2 out of an 08 tsx. I found the motor locally in a junkyard in a wrecked tsx. Ended up getting is for $900.
I ended up going through Autofair to get everything to freshen it up. I also put a type s oil pump, rbc 50* VTC sprocket, and new timing components and a water pump. I was also able to grab a rbc intake manifold from a buddy, and find a 6 speed type s trans out of an 05 rsx type s local as well. I ordered a new exedy clutch, some mtec shifter springs and was ready to get it all together.
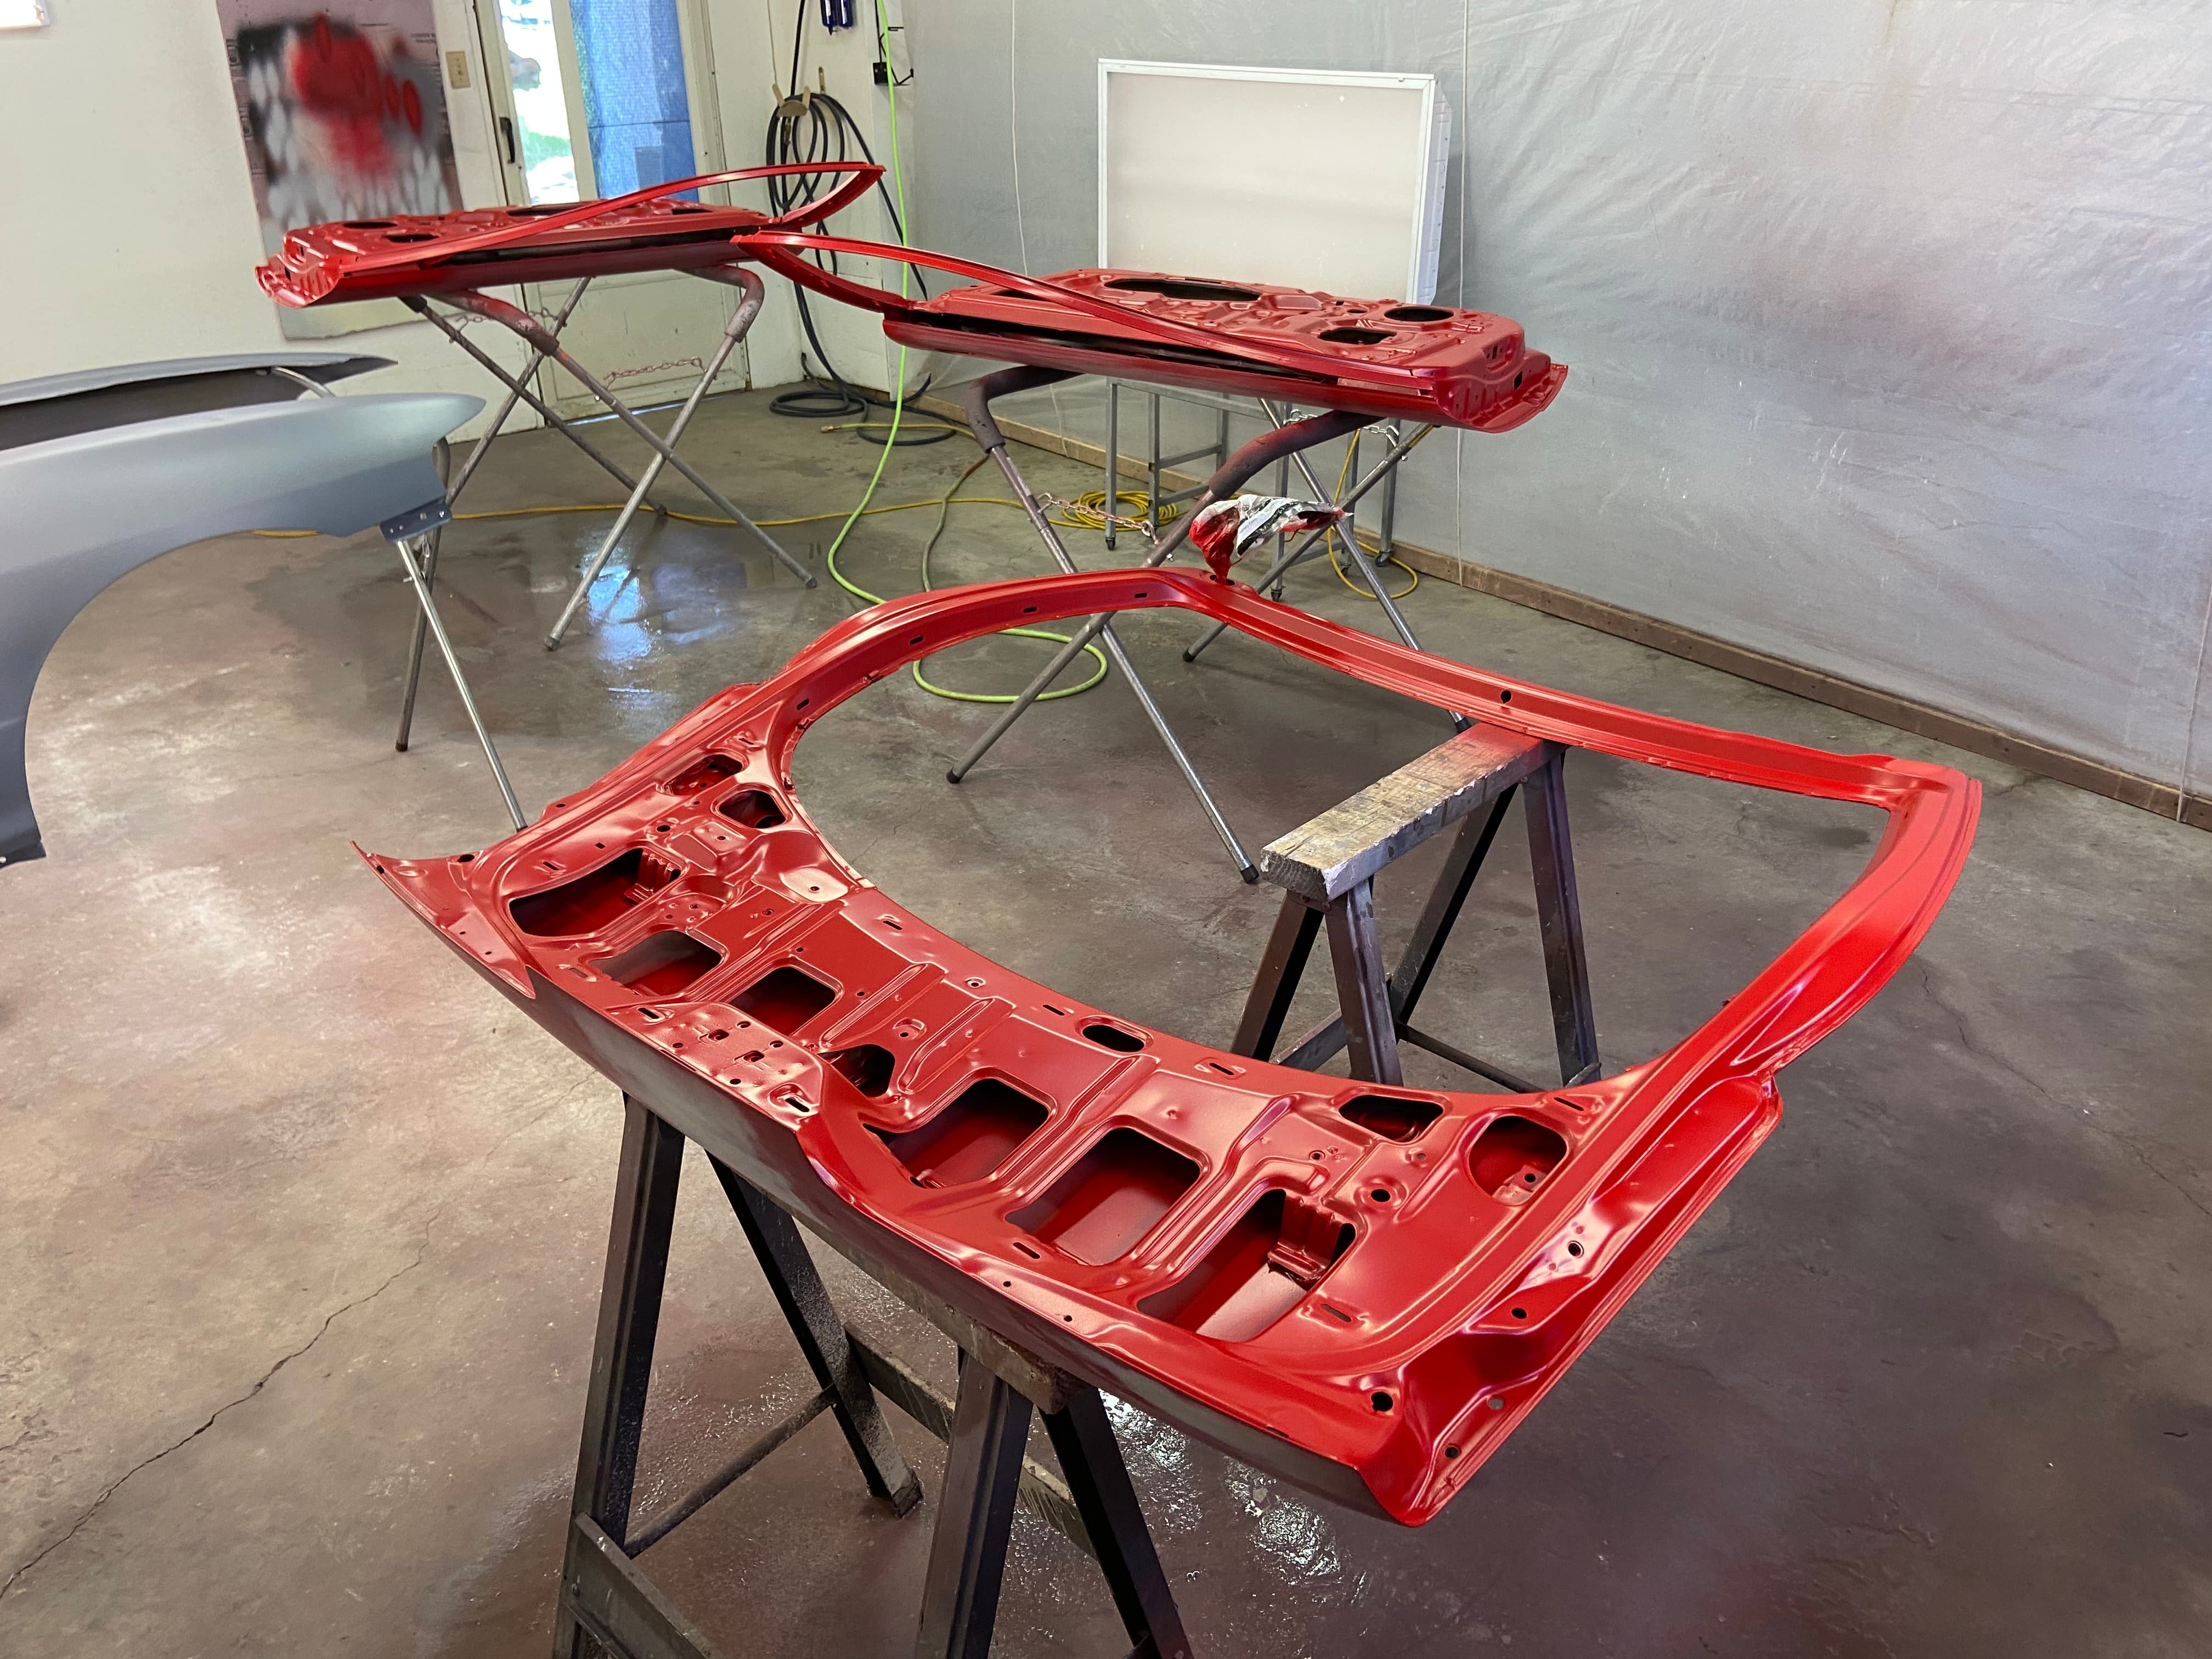
So once I got the motor and trans in the car, it definitively got the motivation going on painting the rest of the car. So I got to work prepping the rest of the shell for paint.
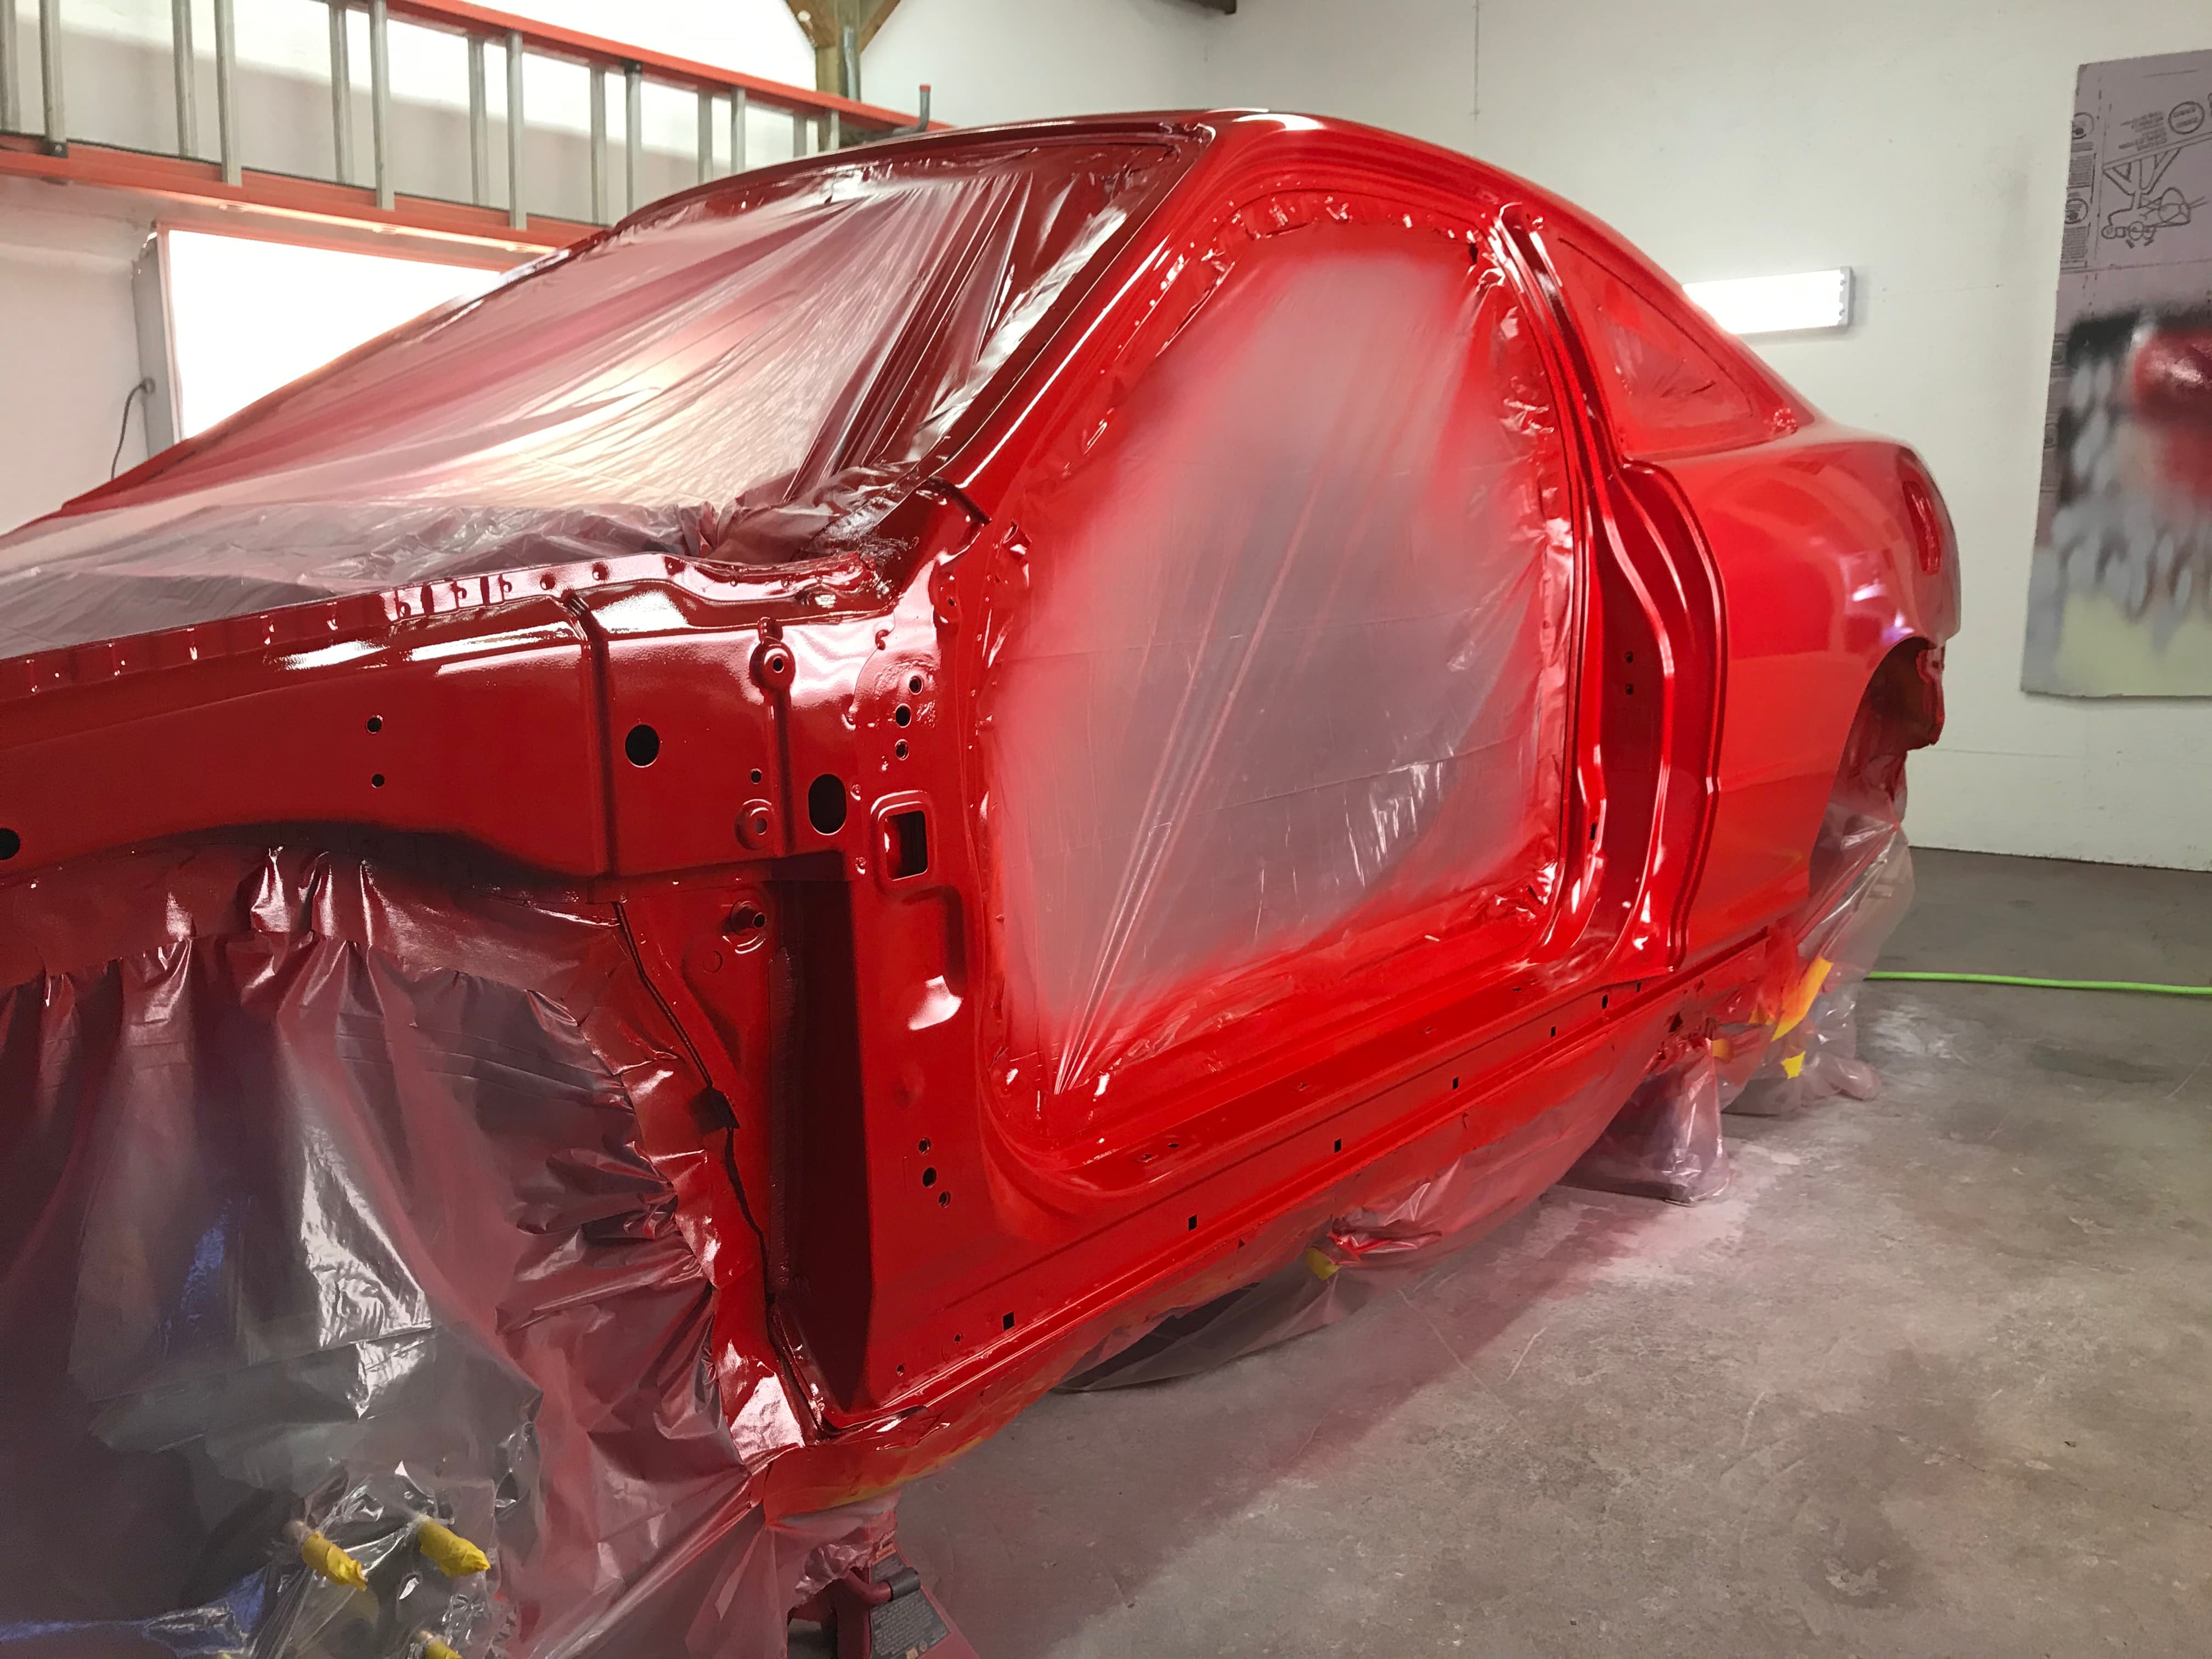
Once we got it over to the painting garage, we started getting everything ready to spray the interior. I ended up taking a week off work to try and get everything done. Was able to get the interior in epoxy primer, color and clear on day 2. After that was done, we started into getting the outside done. The outside still needed one last go with body work as well.
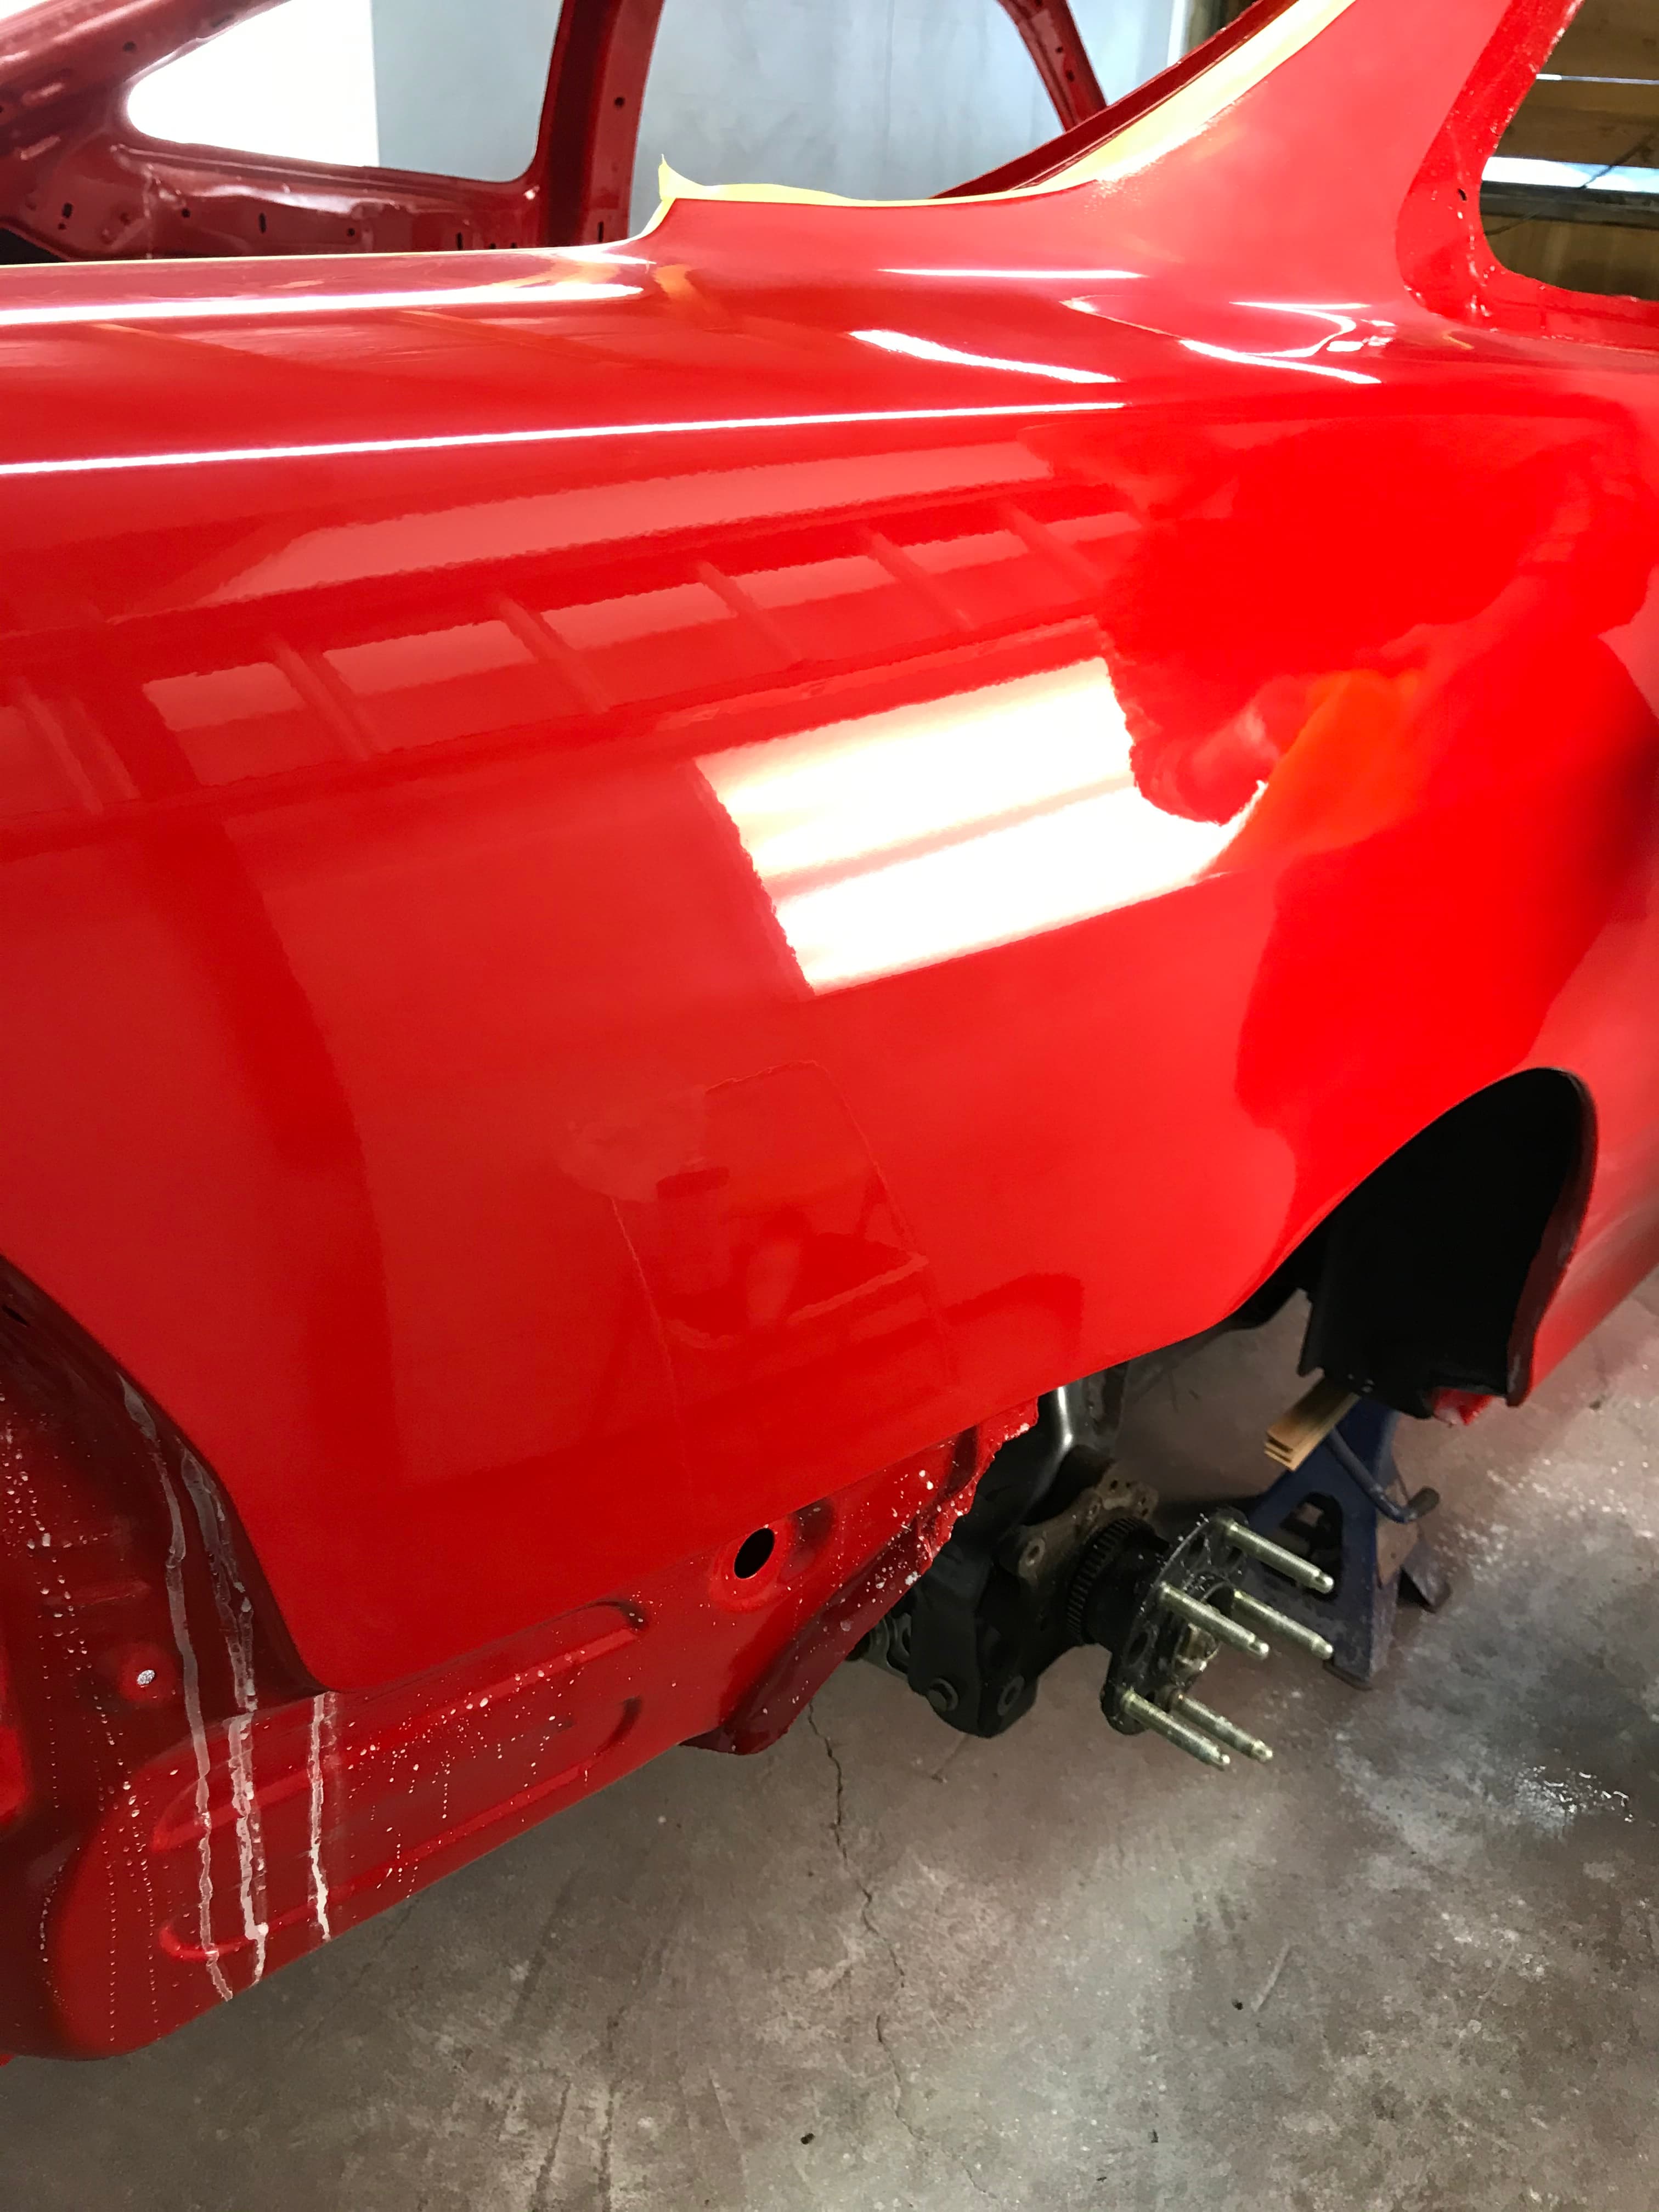
By the end of the week, we didn’t get the outside of the shell in color. After getting the outside in epoxy, then a couple coats of sandable primer, guide coat body work and repeating until we were happy, I had to go back to work. So the car sat for a week and then we came back the following weekend and got it finished up. I can’t put into words how crazy it was to finally see the shell like this in color!
I just want to point out that this was my first time ever spraying a car. I shot every piece on this, so it is definitely not perfect. Painting a car is really hard work. Especially spraying the inside of a car. My back was so sore after reaching in and flexing into all sort of weird positions to not touch anything.
After everything was color sanded and polished, we loaded the car back up and it went back to the shop building ready to start getting put back together! Also note, quite a few panels were not painted here. The garage we painted in isn’t huge, so space is limited. We decided to break it down into batches for painting.
At the time I first threw everything together with all the mismatched panels, ITR expo was going on about 45 minutes from where I live. I contemplated throwing the car together to get there and participate.
The header is an ASP replica. The brand is CNT Racing. I’m not sure they sell this header anymore though.
Once the shell paint was finished, we took the car back to the shop and I got to work on reassembly of the car.
First was getting some pieces cleaned up and coated. I blasted my brake booster and powdercoated it black. I also bought caliper rebuild kits and blasted and powdercoated those as well.
I started with getting the brake booster and master in, as well as working on the rywire brake tuck kit. You can see I originally left the srs mount in the car, but that came out later to fit shifter cables and the engine harness while maintaining heat.
Once the brake line routing was finished up, I got my s2k clutch master in as well as my pedals which I also powdercoated with some fresh black before installing Mugen pedals.
You can also see in the previous picture where I decided on mounting my fuel pressure regulator.
After all of this, the next big item was rear brake lines. The factory lines were really corroded when I dropped them. So I decided to remake them. I’ll go over this on the next update.
So after getting the brake lines started up front, I knew I needed to completely remake the rear lines as well. This turned out to be quite an adventure and I ended up making them twice. The first time around I used regular steel brake line. I was using an old flare tool and it wasn’t capable of flaring the stainless.
Long story short, I bought a new flare tool and a spool of stainless line and remade them after realizing I used the wrong fitting on one of the rear wheel well flares.
After getting my brake lines in, I also ran braided fuel line from The tank all the way to the fpr. I ended up getting an eg sending unit with a new to me itr fuel tank I purchased from jdmohio direct. That way it had the banjo fitting bolt so it was easier to run all an fittings.
To keep everything looking the same, I ended up making my brake booster line out of the same line and fittings. I also tapped and plugged the top of the rbc manifold and ended up adding a new port on the bottom side to hide the vacuum line a little bit.
My favorite part of this whole car build is bring my 4 year old son over at this point and him spraying a little bit of paint on the car. If this car ever goes to him he can say he helped paint it!


 of a build!